I have recently written a Medium post on how I schedule my content. In this post, I will explore how I have set up and managed my content scheduler in Notion. My aim is that by the end of this post, you will have the information to build your own.
Should you decide to do so, I have listed additional helpful resources that I have written over the years.
What is a content schedule?
A content schedule is a tool for scheduling the publishing dates for content. I use mine to help me organize and plan my work.
For more information on how I use my scheduler, I recommend reading my Medium post, “How I Use My Content Schedule to Manage My Work.“
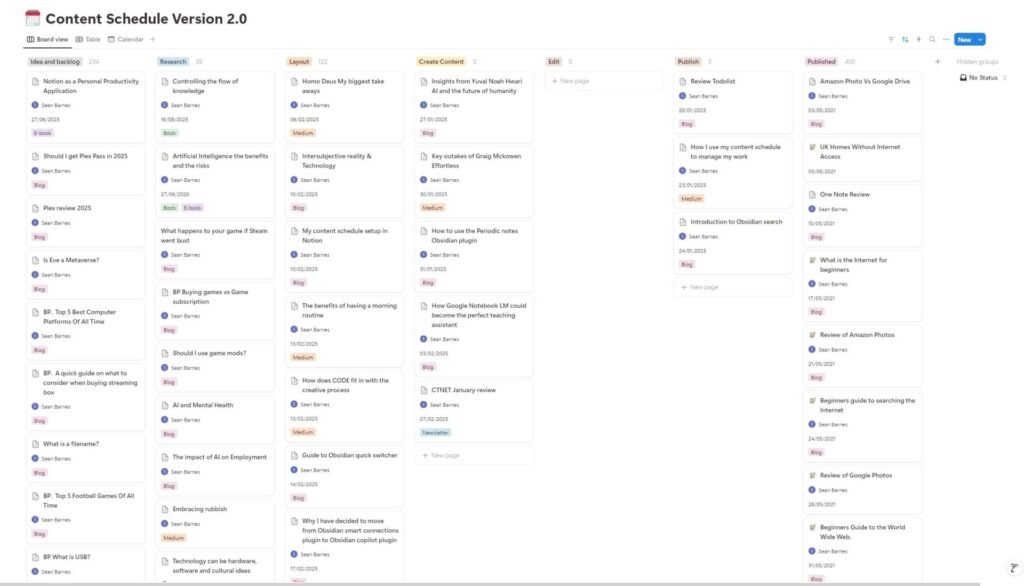
How I Have My Content Scheduler Set Up for Notion
In Notion, I created a data table for my content schedule.
A Notion data table is a database containing details and parameters for each Notion page created on that data table.
For each piece of content I add to the content scheduler, a new page is created in Notion where notes and information can be stored.
Each page is created using a template that asks specific questions about my content. The idea is to help me create an initial plan for my content. I will also do my initial layout for the piece of content.
There are separate templates for each piece of content I create.
My Content Scheduler Properties
I will now share the data fields I use in my content scheduler table, which act as the properties for each piece of content added to my scheduler.
- Name: The name field contains the title for that page. Every Notion database must have a name property to store the title of any Notion page stored in the database.
- Status: This field stores the status value, which changes as a piece of content moves through the creation process. It allows me to manage my workload.
- Assigned To: To whom is the blog post assigned? As I’m the only person who writes for my blog, it isn’t really needed. It was just me being optimistic for a future where I would have hired other writers. It defaults to me, so it’s not a real issue.
- Published Date: The date I plan to publish that piece of content. This date is never set in stone, as I often change it to accommodate my publishing constraints of one post on CTNET every Monday and my monthly CTNET newsletter.
- Start Date: The date I started working on it, which is also the date I wrote the original layout for that piece of content.
- Media Type: The type of media that I plan to publish the content on.
- Social Media Platform: The social media platform on which I plan to promote that piece of content. It defaults to Twitter, even though I promote my work on Mastodon.
- Related Content: This field allows me to reference another piece of content and shows a relationship between them.
- Index Request Submitted: I use this checkbox as part of my process. I check to see if Google has indexed the post; if not, I request that Google index the page. If a page isn’t indexed, it won’t appear as a search result in a Google search.
- Project: I have occasionally released a blog post as part of a project. When this has occurred, the project title will appear in this field.
- Site/Channel: When I created the content scheduler, I only published content on CTNET. But even then, I thought I might publish content for myself. This gives me the flexibility to track both.

Conclusion
You should now have enough information to build your own content scheduler, which is similar to my own.
In the reading list section, I have included some of the other guides I have written over the past few years on creating and setting up Notion databases. For more specific Notion content, visit the Notion area of our site.
I have also added a link to the Notion area of our site, which lists all my Notion posts.
Please let me know how it goes by leaving a comment below.